games101 HomeWork1

games101 HomeWork 1

说起来我自己写games101的作业也是曲曲折折,虚拟机很卡就拿VS配环境,Windows不会配环境,就装Linux,现在装上了Linux,却因为没有经验把Windows格式化了(我是真的沙比),好在还是开始做了,也挺顺利的,所以再来记录一下作业。

这里是作业框架的下载作业框架下载

导航

导航

基础部分

这里需要完成两个函数,一个是模型变换矩阵,一个是透视投影矩阵。

模型变换矩阵

逐个元素地构建模型变换矩阵并返回该矩阵。在此函数中,你只需要实现三维中绕 z 轴旋转的变换矩阵,而不用处理平移与缩放。
这个部分的实现非常简单,只需要记住这个公式就好了。这里给出绕三个轴旋转的旋转矩阵:
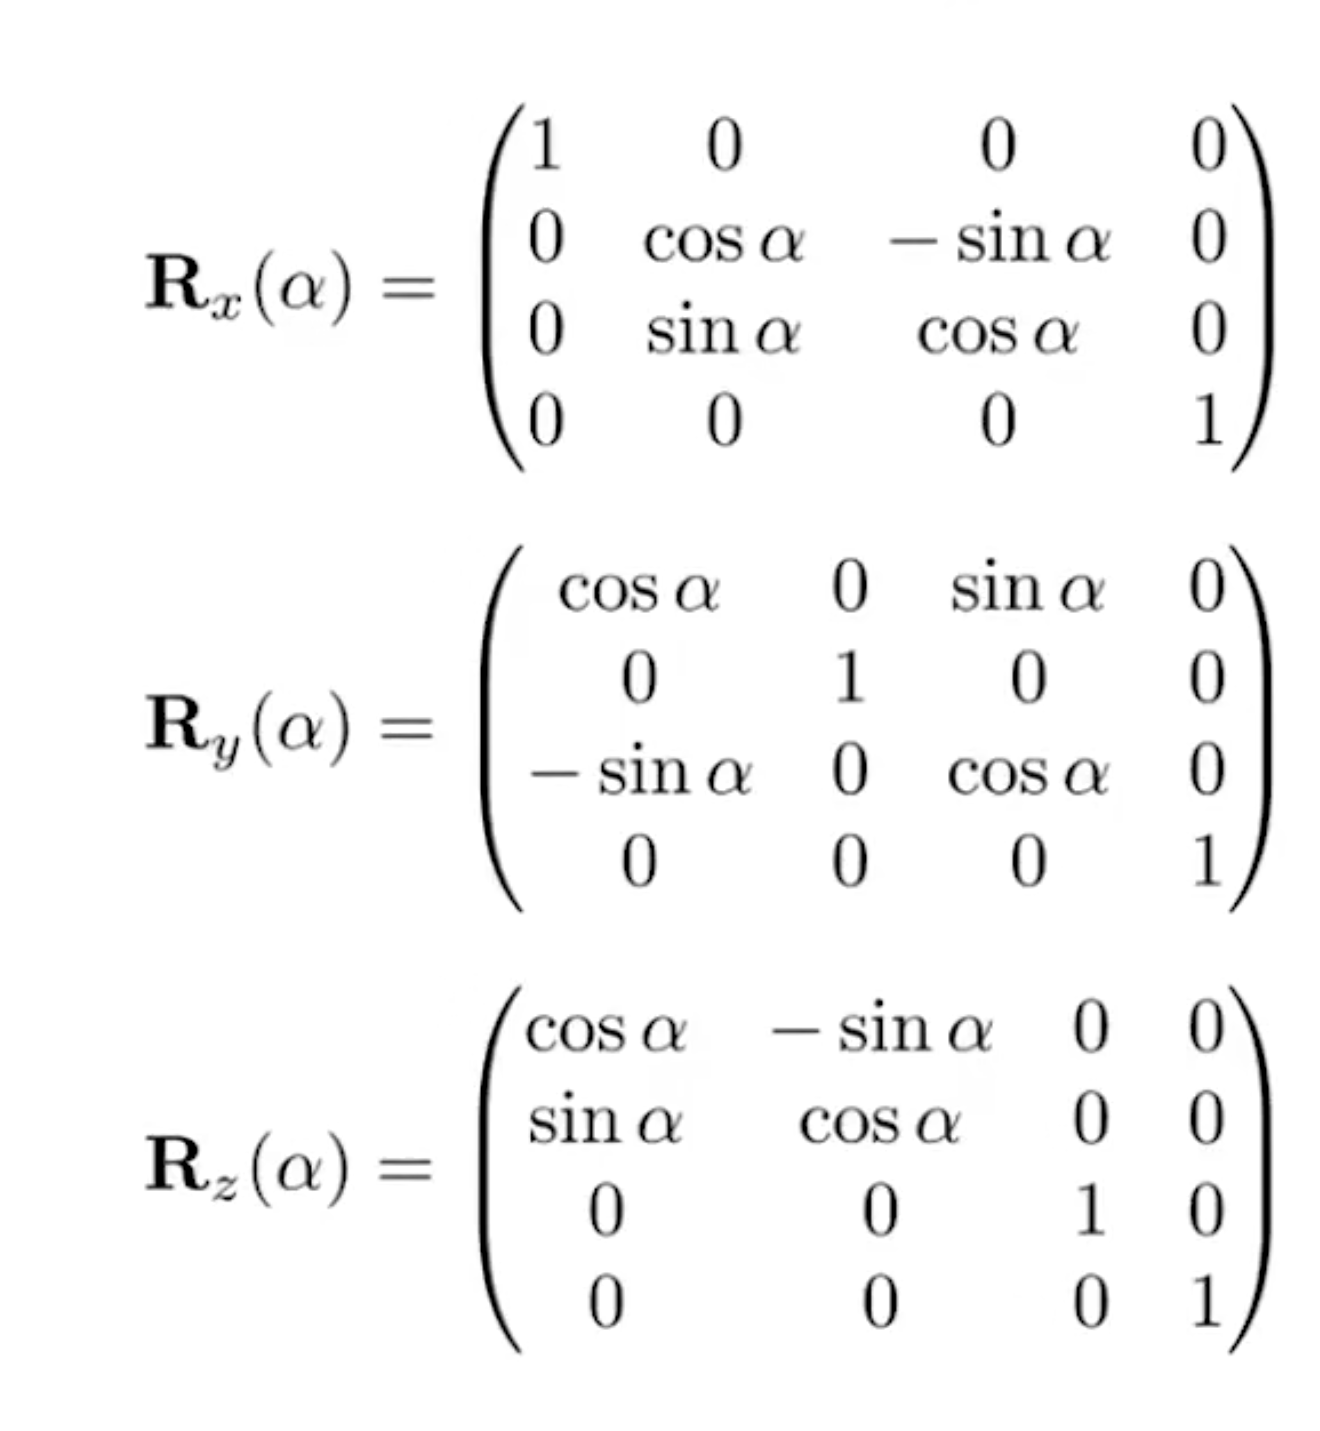
image
代码实现:

1
2
3
4
5
6
7
8
9
10
11
12
13
14
Eigen::Matrix4f get_model_matrix(float rotation_angle)
{
Eigen::Matrix4f model = Eigen::Matrix4f::Identity();
//角度制转弧度制
rotation_angle = rotation_angle / 180.0f * MY_PI;
// TODO: Implement this function
// Create the model matrix for rotating the triangle around the Z axis.
// Then return it.
model << cos(rotation_angle), -sin(rotation_angle), 0, 0,
sin(rotation_angle), cos(rotation_angle), 0, 0,
0, 0, 1, 0,
0, 0, 0, 1;
return model;
}

透视投影矩阵

使用给定的参数逐个元素地构建透视投影矩阵并返回
该矩阵。

这个题目的参数定义其实不是很明显(至少位蒙b了很久),先看一下函数原型:

1
Eigen::Matrix4f get_projection_matrix(float eye_fov, float aspect_ratio, float zNear, float zFar)

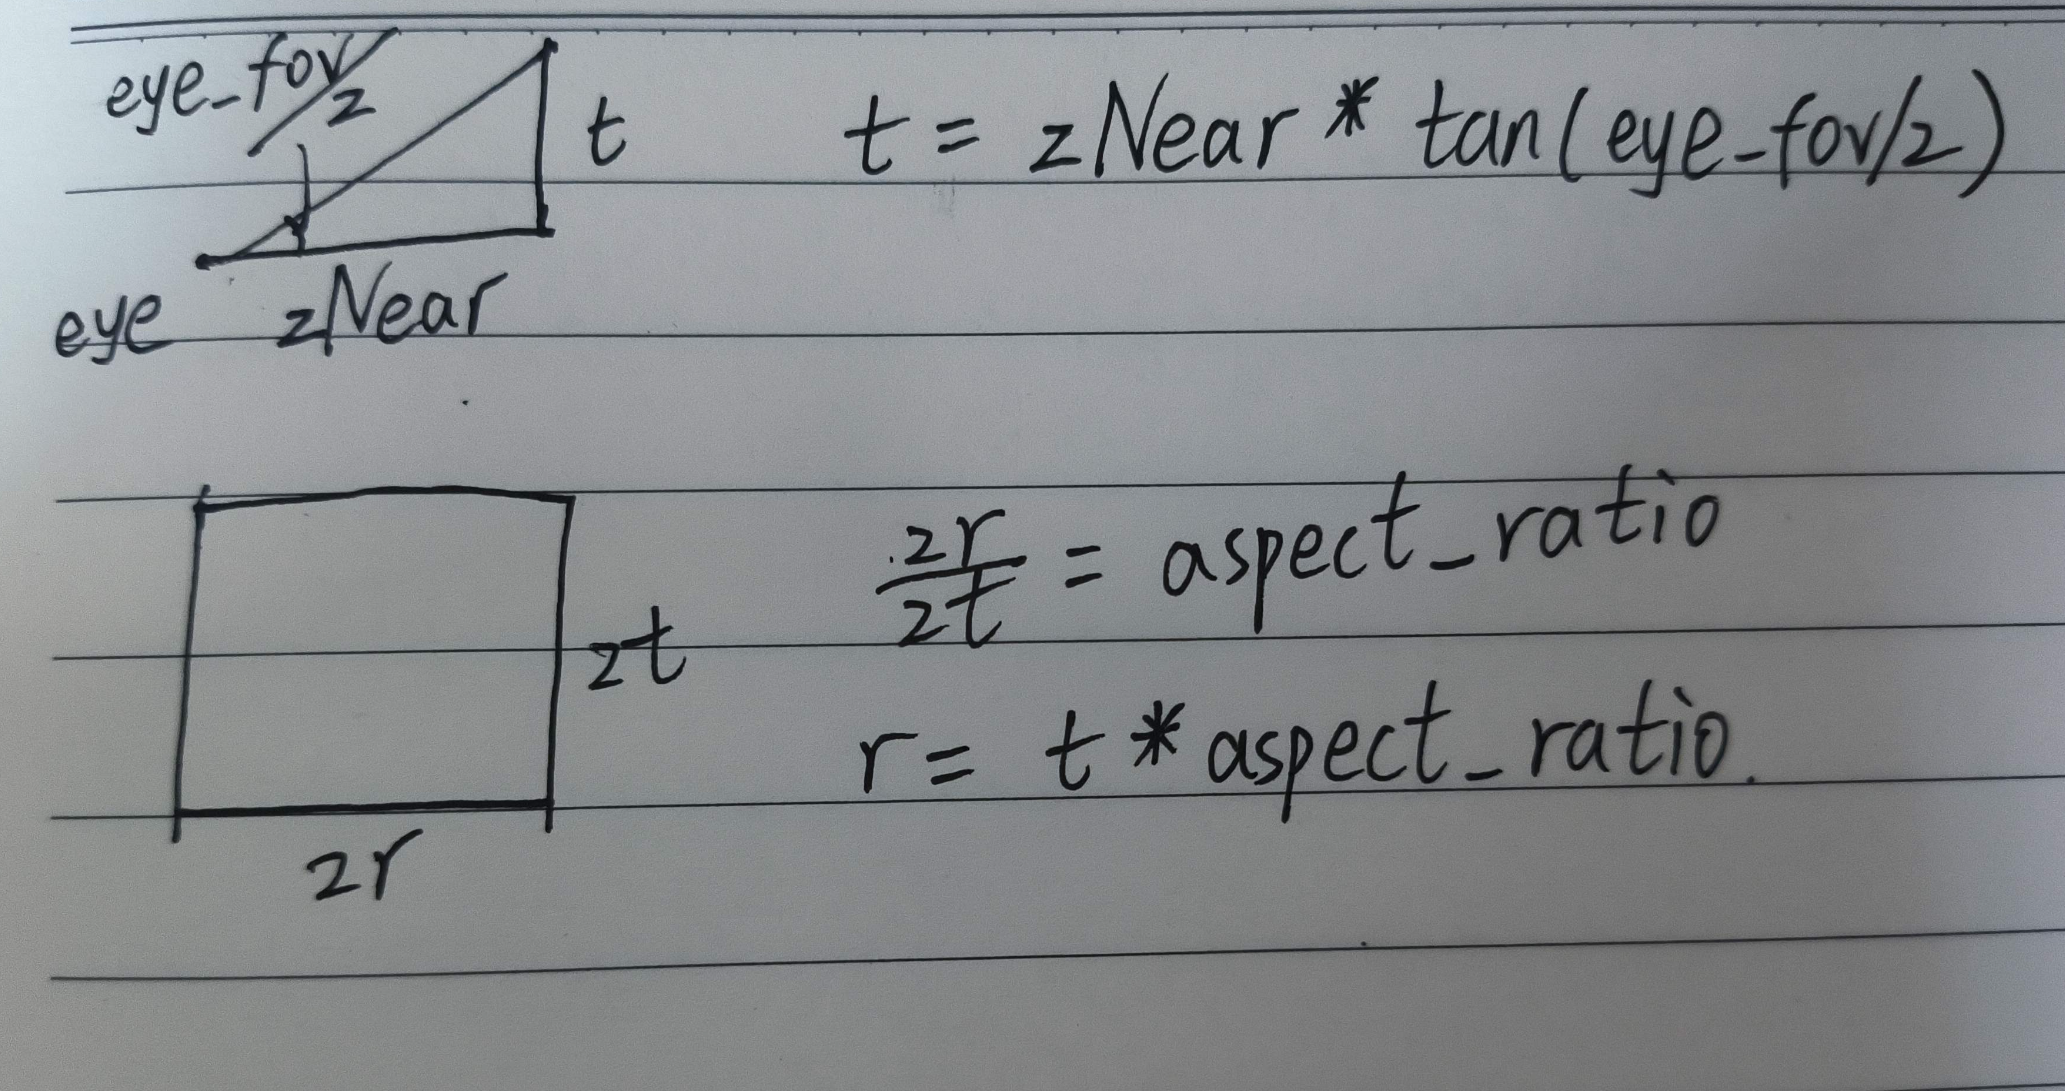
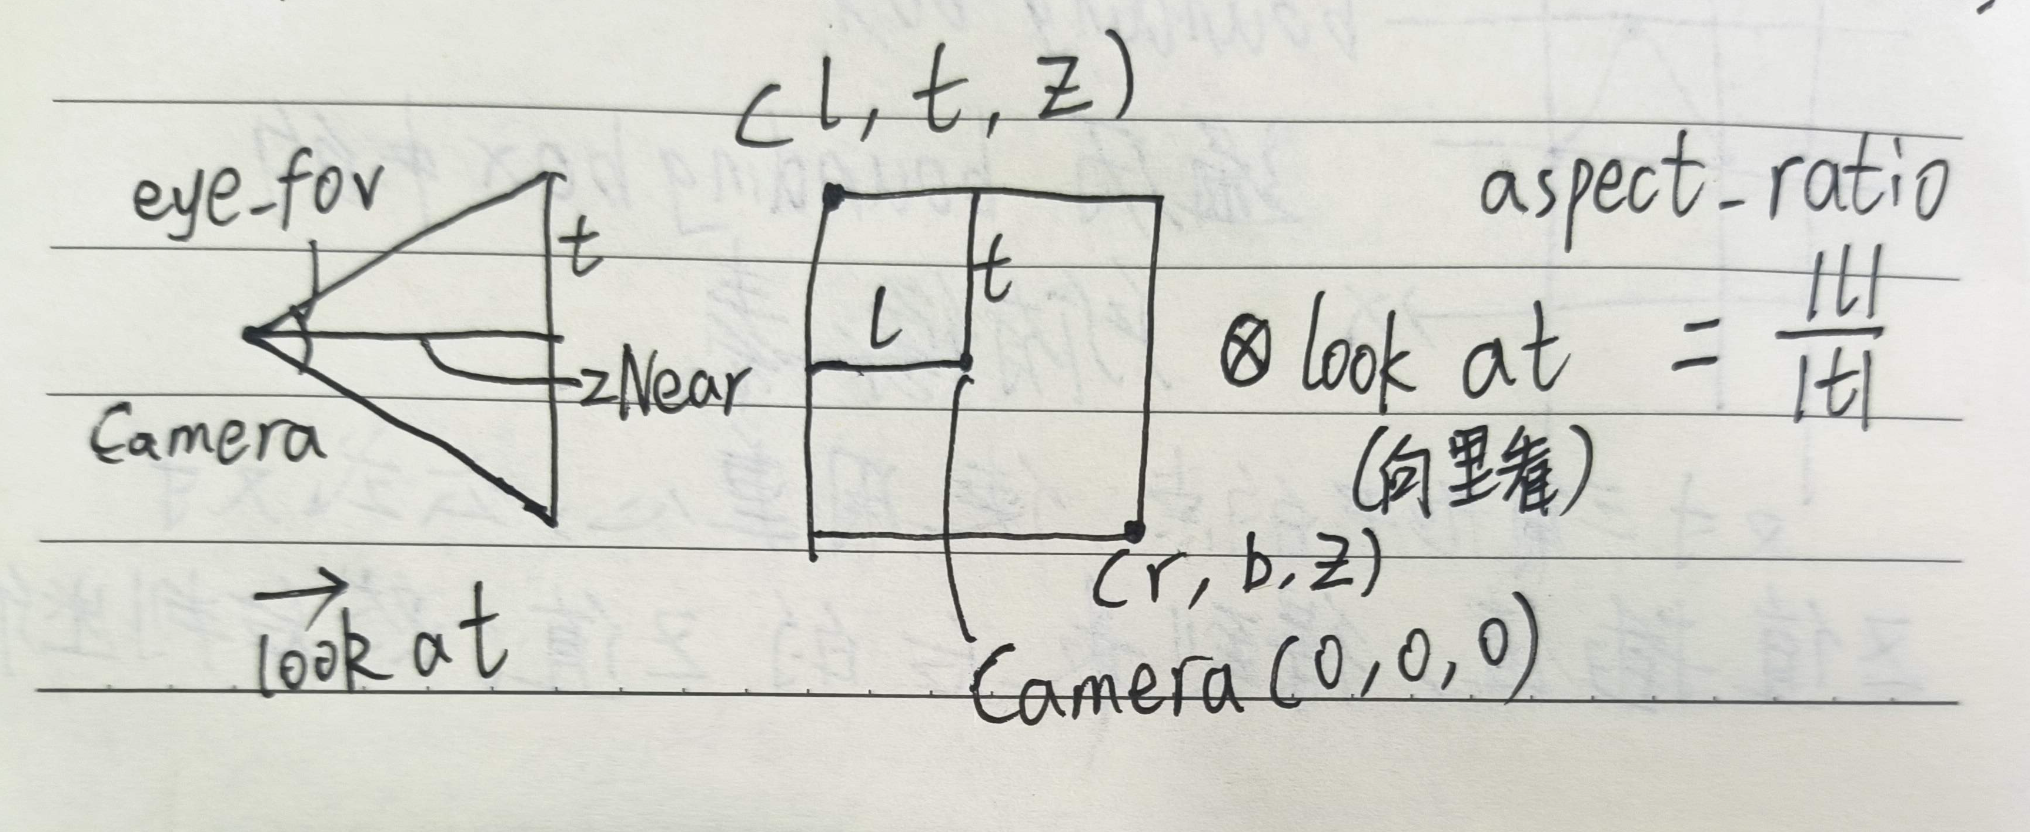
来解读一下前两个参数,eye_fov指的是摄像机的垂直可视角度,aspect_ratio指的是摄像机的长宽比。使用这四个值也能算出正交投影矩阵。(下图只供参考)
image

我们从透视投影矩阵开始:
根据课堂上的推导,我们已经知道透视投影矩阵的最终结果,并且所需要的值只有zNearzFar,于是我们能直接写出这个矩阵:

1
2
3
4
P << zNear, 0, 0, 0,
0, zNear, 0, 0,
0, 0, zNear + zFar, -zNear * zFar,
0, 0, 1, 0;

然后是我们的正交投影部分了,正交投影需要用到的数据有六个,分别是长方体的参数。
$$[l,r]\times[b,t]\times[f,n]$$
先把正的数据处理掉,直接给出答案,再证明

  • \(t=zNear*tan(eye\_fov/2)\)(弧度化后)
  • \(r=t*aspect\_ratio\)
    另外的lb分别等于rt的相反数。
    证明如下:(仅供参考)
    image

最后还剩下nf,这两个数和他们的名字差别很大,分别是后和前,赋值的时候需要小心,而且他们的值并不是zNear和zFar分别赋值,而是相反数赋值。如下

1
2
f = -zNear;
n = -zFar;

有了数据,我们就可进行投影矩阵的实现了,正交投影矩阵如下:

1
2
3
4
5
6
7
8
9
10
11
12
13
14
15
16
17
18
      eye_fov = eye_fov / 180 * MY_PI;
float l, r, b, t, n, f;
//注意这里的f和n代表的意义
f = -zNear;
n = -zFar;
t = -zNear * tan(eye_fov/2);
b = -t;
r = t * aspect_ratio;
l = -r;
S << 2 / (r - l), 0, 0, 0,
0, 2 / (t - b), 0, 0,
0, 0, 2 / (n - f), 0,
0, 0, 0, 1;
M << 1, 0, 0, -(r + l) / 2,
0, 1, 0, -(t + b) / 2,
0, 0, 1, -(n + f) / 2,
0, 0, 0, 1;
//S*M得到正交投影矩阵

普通要求代码汇总

1
2
3
4
5
6
7
8
9
10
11
12
13
14
15
16
17
18
19
20
21
22
23
24
25
26
27
28
29
30
31
32
33
34
35
36
37
38
39
40
41
42
43
44
45
46
47
48
49
50
51
52
53
54
55
56
57
58
59
60
61
//main.cpp
bool ProjectMode=true;//这是一个控制模式的参数
Eigen::Matrix4f get_model_matrix(float rotation_angle)
{
Eigen::Matrix4f model = Eigen::Matrix4f::Identity();
rotation_angle = rotation_angle / 180.0f * MY_PI;
// TODO: Implement this function
// Create the model matrix for rotating the triangle around the Z axis.
// Then return it.
model << cos(rotation_angle), -sin(rotation_angle), 0, 0,
sin(rotation_angle), cos(rotation_angle), 0, 0,
0, 0, 1, 0,
0, 0, 0, 1;
return model;
}
Eigen::Matrix4f get_projection_matrix(float eye_fov, float aspect_ratio,
float zNear, float zFar)
{
// Students will implement this function

Eigen::Matrix4f projection = Eigen::Matrix4f::Identity();

// TODO: Implement this function
// Create the projection matrix for the given parameters.
// Then return it.
if (!ProjectMode)
{
Eigen::Matrix4f S, M, P;
eye_fov = eye_fov / 180 * MY_PI;
float l, r, b, t, n, f;
//注意这里的f和n代表的意义
f = -zNear;
n = -zFar;
t = -zNear * tan(eye_fov/2);
b = -t;
r = t * aspect_ratio;
l = -r;
S << 2 / (r - l), 0, 0, 0,
0, 2 / (t - b), 0, 0,
0, 0, 2 / (n - f), 0,
0, 0, 0, 1;
M << 1, 0, 0, -(r + l) / 2,
0, 1, 0, -(t + b) / 2,
0, 0, 1, -(n + f) / 2,
0, 0, 0, 1;
P << zNear, 0, 0, 0,
0, zNear, 0, 0,
0, 0, zNear + zFar, -zNear * zFar,
0, 0, 1, 0;
return S * M * P;
}
else//这是精简版本
{
eye_fov = eye_fov / 180 * MY_PI;
projection << 1 / (aspect_ratio * tan(eye_fov / 2.0f)), 0, 0, 0,
0, 1 / tan(eye_fov / 2.0f), 0, 0,
0, 0, -(zFar + zNear) / (zFar - zNear), 2 * zFar * zNear / (zNear - zFar),
0, 0, -1, 0;
return projection;
}
}

提升部分

提升部分要求:在 main.cpp 中构造一个函数,该函数的作用是得到绕任意
过原点的轴的旋转变换矩阵。根据101中的推导,我们需要计算的东西并不多,按要求写好就行了。我选择重载get_model_matrix函数,来实现任意旋转轴的旋转操作。

image

1
2
3
4
5
6
7
8
9
10
11
12
13
14
15
16
17
18
Eigen::Matrix4f get_rotation(Vector3f axis, float rotation_angle)
{
rotation_angle = rotation_angle / 180.0f * MY_PI;
Eigen::Matrix4f Result = Eigen::Matrix4f::Identity();
Eigen::Matrix3f I = Eigen::Matrix3f::Identity();//单位矩阵
Eigen::Matrix3f N = Eigen::Matrix3f::Identity();
Eigen::Matrix3f ResultMat3 = Eigen::Matrix3f::Identity();
N << 0, -axis[2], axis[1],
axis[2], 0, -axis[0],
-axis[1], axis[0], 0;
ResultMat3 = I * cos(rotation_angle) + (1 - cos(rotation_angle)) * axis * axis.transpose() + sin(rotation_angle) * N;
Result << ResultMat3(0, 0), ResultMat3(0, 1), ResultMat3(0, 2), 0,
ResultMat3(1, 0), ResultMat3(1, 1), ResultMat3(1, 2), 0,
ResultMat3(2, 0), ResultMat3(2, 1), ResultMat3(2, 2), 0,
0, 0, 0, 1;

return Result;
}

其余代码和普通要求一致。得到结果如下:

结果

因为是第一次作业,所以我这里给出编译的操作:
先来到作业目录
image
创建build文件夹
image
来到build文件夹
image
使用上级目录创建项目文件
image
构建编译,这里的-j8是表示调用的核心数量,最后一句target Rasterizer表示可执行文件为Rasterizer
image
运行
image
image
按下Esc或者Ctrl+C停止
image
全部指令汇总

1
2
3
4
5
mkdir build
cd build
cmake ..
make -j8
./Rasterizer

普通要求

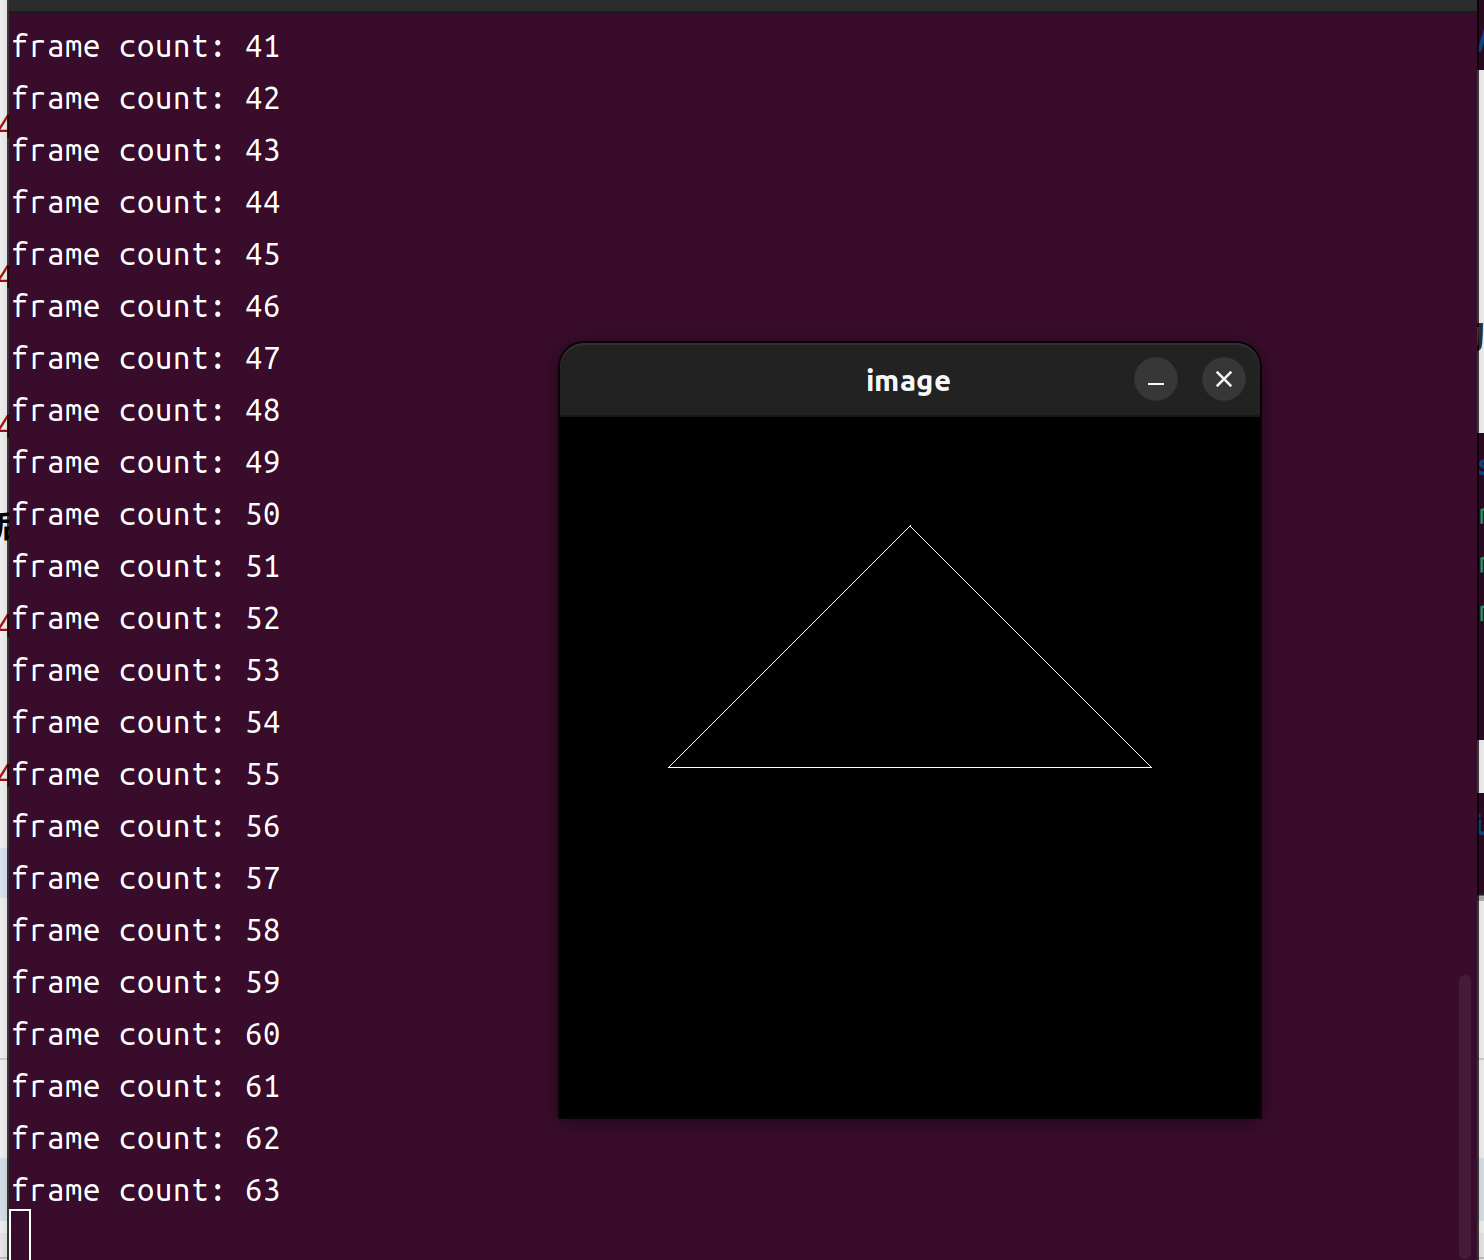
运行指令与结果

./Rasterizer 不带参数运行

image

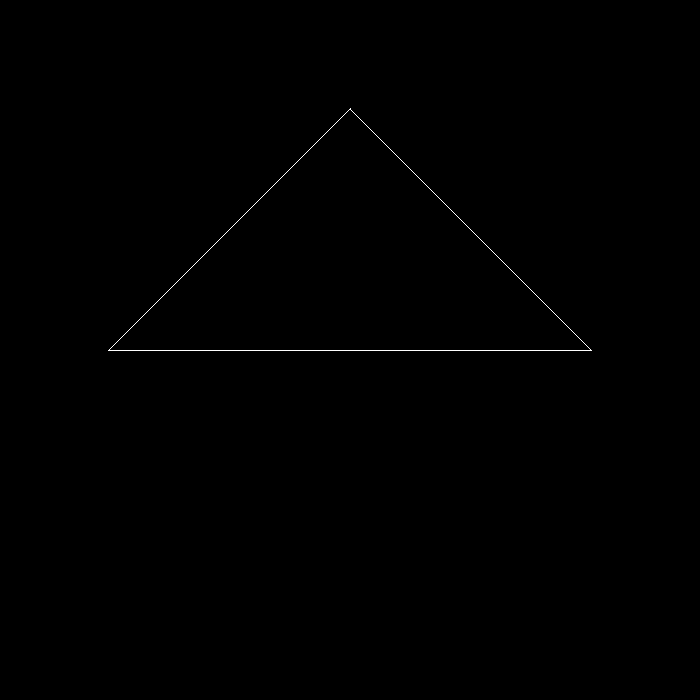
./Rasterizer -r 0 output.png无旋转保存图片

image
image

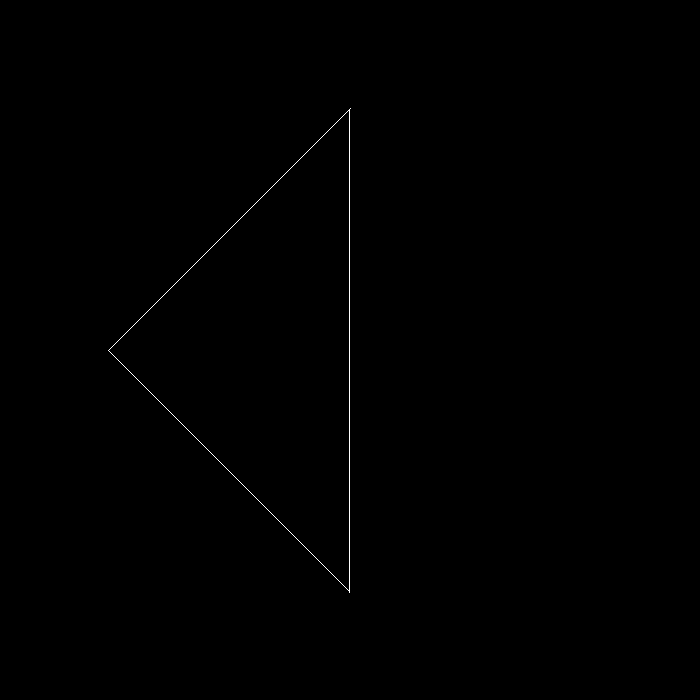
./Rasterizer -r 90 output90.png旋转保存图片
image

提升要求

先介绍一下main函数的两个参数argcargv

  • argc全称arugment count,表示调用程序的时候,传入的参数的个数。
  • argv全称argument vector,表示调用程序的时候,传入的参数向量,类型为字符串
    默认的,argv[0]是调用程序的完整路径,然后argv[0]-argv[argc-1]都是可以访问的字符串。在程序中,我们可以使用标准库定义的stof函数,把字符串转成浮点型,或者使用stod把字符串转化成整形。知道这一点之后,我们就可以设计一个main函数来把我们自定义的旋转轴作为参数传入程序了。

这里是我自己设计的一个传参方案,有兴趣的可以读一下程序。

main.cpp

1
2
3
4
5
6
7
8
9
10
11
12
13
14
15
16
17
18
19
20
21
22
23
24
25
26
27
28
29
30
31
32
33
34
35
36
37
38
39
40
41
42
43
44
45
46
47
48
49
50
51
52
53
54
55
56
57
58
59
60
61
62
63
64
65
66
67
68
69
70
71
72
73
74
75
76
77
78
79
80
81
82
83
84
85
86
87
88
89
90
91
92
93
94
95
96
97
98
99
100
101
102
103
104
105
106
107
108
109
110
111
112
113
114
115
116
117
118
119
120
121
122
123
124
125
126
127
128
129
130
131
132
133
134
135
136
137
138
139
140
141
142
143
144
145
146
147
148
149
150
151
152
153
154
155
156
157
158
159
160
161
162
163
164
165
166
167
168
169
170
171
172
173
174
175
176
177
178
179
180
181
182
183
184
185
186
187
188
189
190
191
192
193
194
195
196
197
198
199
200
201
202
203
204
205
206
207
208
209
#include "Triangle.hpp"
#include "rasterizer.hpp"
#include <eigen3/Eigen/Eigen>
#include <iostream>
#include <opencv2/opencv.hpp>

constexpr double MY_PI = 3.1415926;
bool ProjectMode=true;

Eigen::Matrix4f get_view_matrix(Eigen::Vector3f eye_pos)
{
Eigen::Matrix4f view = Eigen::Matrix4f::Identity();

Eigen::Matrix4f translate;
translate << 1, 0, 0, -eye_pos[0], 0, 1, 0, -eye_pos[1], 0, 0, 1,
-eye_pos[2], 0, 0, 0, 1;

view = translate * view;

return view;
}

Eigen::Matrix4f get_model_matrix(float rotation_angle)
{
Eigen::Matrix4f model = Eigen::Matrix4f::Identity();
rotation_angle = rotation_angle / 180.0f * MY_PI;
// TODO: Implement this function
// Create the model matrix for rotating the triangle around the Z axis.
// Then return it.
model << cos(rotation_angle), -sin(rotation_angle), 0, 0,
sin(rotation_angle), cos(rotation_angle), 0, 0,
0, 0, 1, 0,
0, 0, 0, 1;
return model;
}

// Rodrigues rotation formula
Eigen::Matrix4f get_rotation(Vector3f axis, float angle)
{
angle = angle / 180.0f * MY_PI;
Eigen::Matrix4f Result = Eigen::Matrix4f::Identity();
Eigen::Matrix3f E = Eigen::Matrix3f::Identity();
Eigen::Matrix3f N = Eigen::Matrix3f::Identity();
Eigen::Matrix3f ResultMat3 = Eigen::Matrix3f::Identity();
N << 0, -axis[2], axis[1],
axis[2], 0, -axis[0],
-axis[1], axis[0], 0;
ResultMat3 = E * cos(angle) + (1 - cos(angle)) * axis * axis.transpose() + sin(angle) * N;
Result << ResultMat3(0, 0), ResultMat3(0, 1), ResultMat3(0, 2), 0,
ResultMat3(1, 0), ResultMat3(1, 1), ResultMat3(1, 2), 0,
ResultMat3(2, 0), ResultMat3(2, 1), ResultMat3(2, 2), 0,
0, 0, 0, 1;

return Result;
}


Eigen::Matrix4f get_projection_matrix(float eye_fov, float aspect_ratio,
float zNear, float zFar)
{
// Students will implement this function

Eigen::Matrix4f projection = Eigen::Matrix4f::Identity();

// TODO: Implement this function
// Create the projection matrix for the given parameters.
// Then return it.
if (!ProjectMode)
{
std::cout<<"Protable answer"<<std::endl;
Eigen::Matrix4f S, M, P;
eye_fov = eye_fov / 180 * MY_PI;
float l, r, b, t, n, f;
//注意这里的f和n代表的意义
f = -zNear;
n = -zFar;
t = -zNear * tan(eye_fov/2);
b = -t;
r = t * aspect_ratio;
l = -r;
S << 2 / (r - l), 0, 0, 0,
0, 2 / (t - b), 0, 0,
0, 0, 2 / (n - f), 0,
0, 0, 0, 1;
M << 1, 0, 0, -(r + l) / 2,
0, 1, 0, -(t + b) / 2,
0, 0, 1, -(n + f) / 2,
0, 0, 0, 1;
P << zNear, 0, 0, 0,
0, zNear, 0, 0,
0, 0, zNear + zFar, -zNear * zFar,
0, 0, 1, 0;
return S * M * P;
}
else
{
std::cout<<"true answer"<<std::endl;
eye_fov = eye_fov / 180 * MY_PI;
projection << 1 / (aspect_ratio * tan(eye_fov / 2.0f)), 0, 0, 0,
0, 1 / tan(eye_fov / 2.0f), 0, 0,
0, 0, -(zFar + zNear) / (zFar - zNear), 2 * zFar * zNear / (zNear - zFar),
0, 0, -1, 0;
return projection;
}
}
int main(int argc, const char **argv)
{
float angle = 0;
bool command_line = false;
Eigen::Vector3f axis = Eigen::Vector3f(0.f, 1.f, 0.f);
std::string filename = "output.png";
if(argc>=2){
std::cout<<argv[1]<<std::endl;
if(argv[1][1]=='m')//使用精简版本
ProjectMode=true;
else if(argv[1][1]=='p')//使用便阅读版本
ProjectMode=false;
std::cout<<ProjectMode<<std::endl;
}

if (argc >= 3)
{
std::cout<<argc<<std::endl;

angle = std::stof(argv[2]); // -r by default
if (argc == 4)
{
command_line = true;
filename = std::string(argv[3]);
}
else if(argc==6){//DIY(
axis.x()=std::stof(argv[3]);
axis.y()=std::stof(argv[4]);
axis.z()=std::stof(argv[5]);
axis.normalize();
}
//
}

rst::rasterizer r(700, 700);

Eigen::Vector3f eye_pos = {0, 0, 5};

std::vector<Eigen::Vector3f> pos{{2, 0, -2}, {0, 2, -2}, {-2, 0, -2}};

std::vector<Eigen::Vector3i> ind{{0, 1, 2}};

auto pos_id = r.load_positions(pos);
auto ind_id = r.load_indices(ind);

int key = 0;
int frame_count = 0;

if (command_line)
{
r.clear(rst::Buffers::Color | rst::Buffers::Depth);

r.set_model(get_model_matrix(angle));
r.set_view(get_view_matrix(eye_pos));
r.set_projection(get_projection_matrix(45, 1, 0.1, 50));

r.draw(pos_id, ind_id, rst::Primitive::Triangle);
cv::Mat image(700, 700, CV_32FC3, r.frame_buffer().data());
image.convertTo(image, CV_8UC3, 1.0f);

cv::imwrite(filename, image);

return 0;
}


while (key != 27)
{
r.clear(rst::Buffers::Color | rst::Buffers::Depth);


r.set_model(get_model_matrix(angle));
//DIY
if (argc == 6){
r.set_model(get_rotation(axis, angle));
std::cout<<"axis x:"<<axis.x()<<" y:"<<axis.y()<<" z:"<<axis.z()<<std::endl<<"angle:"<<angle<<std::endl;
}
//
r.set_view(get_view_matrix(eye_pos));
r.set_projection(get_projection_matrix(45, 1, 0.1, 50));

r.draw(pos_id, ind_id, rst::Primitive::Triangle);

cv::Mat image(700, 700, CV_32FC3, r.frame_buffer().data());
image.convertTo(image, CV_8UC3, 1.0f);
cv::imshow("image", image);
key = cv::waitKey(10);

std::cout << "frame count: " << frame_count++ << '\n';

if (key == 'a')
{
angle += 10;
}
else if (key == 'd')
{
angle -= 10;
}
}

return 0;
}


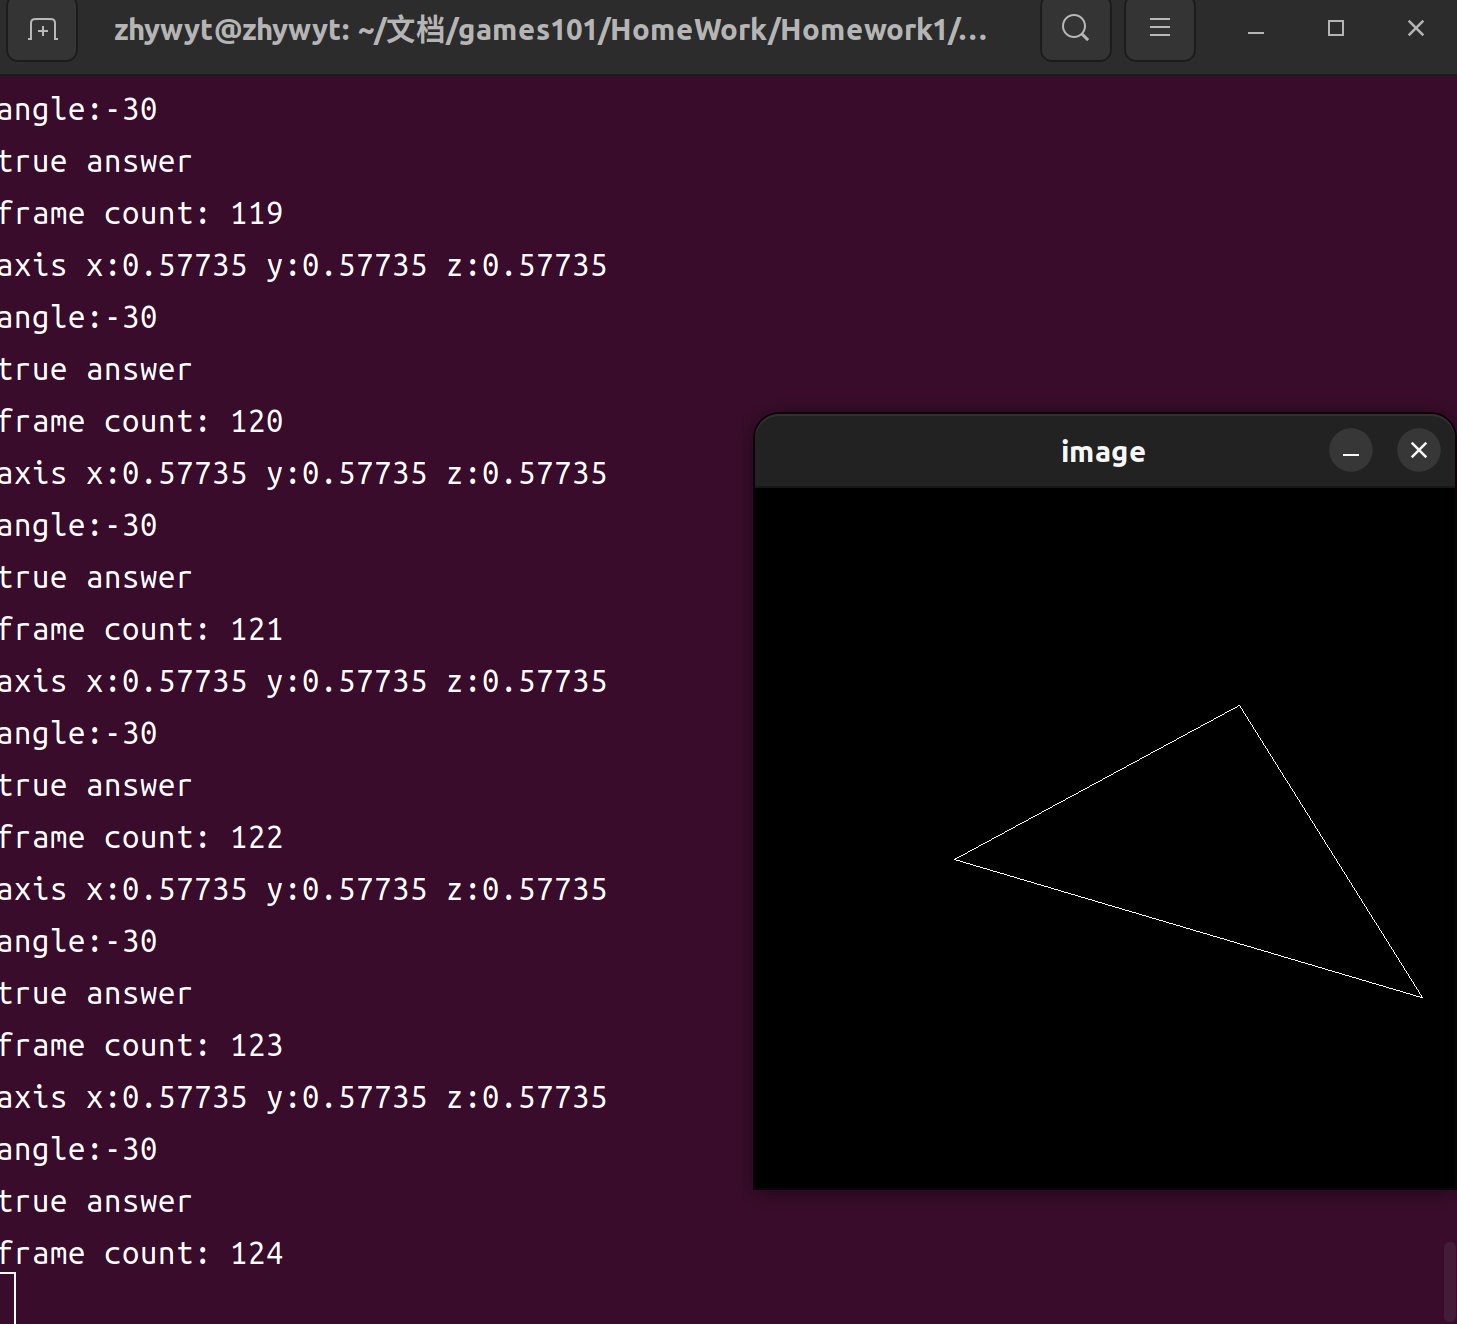
部分效果如下:
image
可执行操作如下

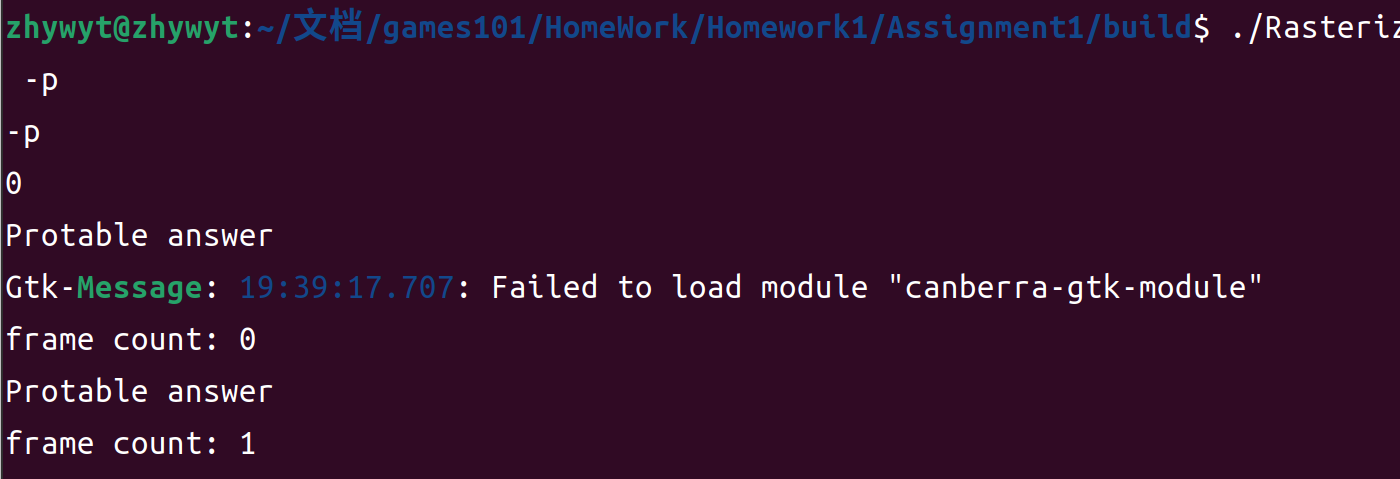
  • ./Rasterizer -p 使用便阅读版本矩阵进行计算
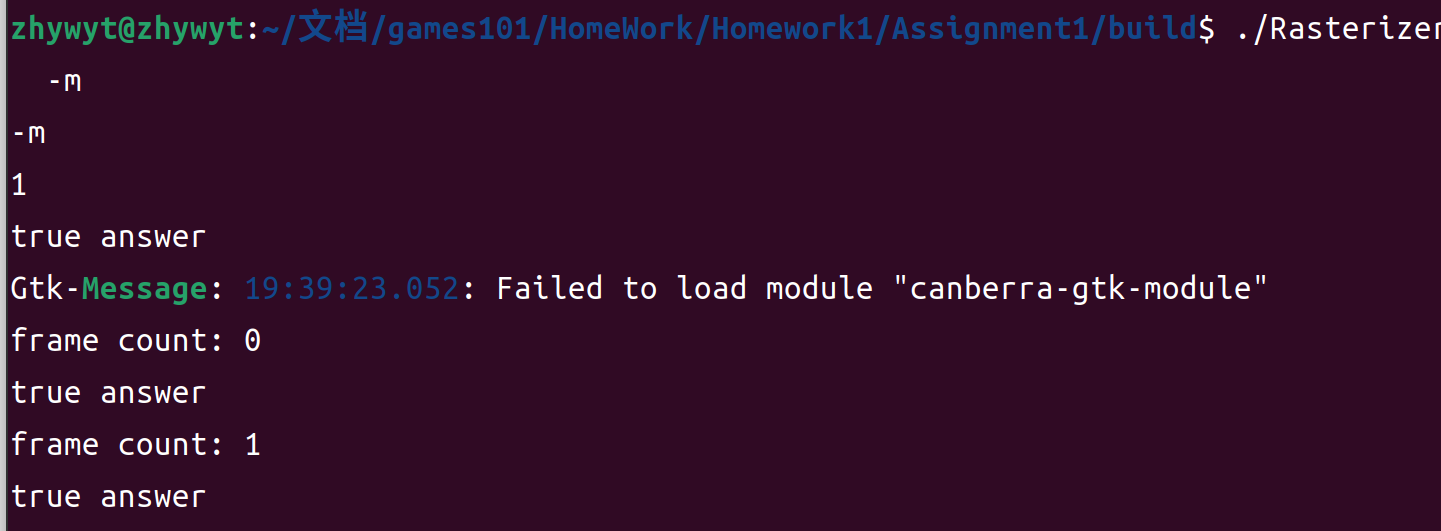
  • ./Rasterizer -m使用简便版本矩阵进行计算
    image
    image

games101 Hw1 到此就结束啦!

下一篇:图形填充


2023.8.17

写完之后,感觉少了点什么,于是便有了下面的东西。

框架解读

作业一的文件如下

  • main.cpp
  • rasterizer.cpp
  • rasterizer.hpp
  • Triangle.cpp
  • Triangle.hpp

读框架代码要从接口开始,也就是头文件,我们先注意一下各个头文件的引用情况:

1
2
3
4
5
6
7
8
9
10
11
12
13
14
15
16
17
18
19
20
---------------------------------------------
//main
#include "Triangle.hpp"
#include "rasterizer.hpp"
#include <eigen3/Eigen/Eigen>
#include <iostream>
#include <opencv2/opencv.hpp>
---------------------------------------------

//raserizer.hpp
#include "Triangle.hpp"
#include <algorithm>
#include <eigen3/Eigen/Eigen>
using namespace Eigen;
---------------------------------------------

//Triangle.hpp
#include <eigen3/Eigen/Eigen>
using namespace Eigen;
---------------------------------------------

可以看到,Triangle.hpp是一个独立的类,只需要依赖数学库Eigen,我们从这个三角形类开始。

Triangle

数据成员

这里用到的三角形类存储了一个三角形的顶点部分信息,以达到绘制一个线框所需要的数据结构。具体有这些:

  • Vector3f v[3]; 顶点坐标
  • Vector3f color[3]; 顶点颜色
  • Vector2f tex_coords[3]; 纹理坐标
  • Vector3f normal[3]; 法线方向
    其中只有顶点坐标在作业一中用到了。

接口函数

1
2
3
4
5
6
7
8
9
10
11
12
//访问顶点坐标
Eigen::Vector3f a() const { return v[0]; }
Eigen::Vector3f b() const { return v[1]; }
Eigen::Vector3f c() const { return v[2]; }
//设置顶点坐标、法线、颜色、纹理坐标
void setVertex(int ind, Vector3f ver); /*set i-th vertex coordinates */
void setNormal(int ind, Vector3f n); /*set i-th vertex normal vector*/
void setColor(int ind, float r, float g, float b); /*set i-th vertex color*/
void setTexCoord(int ind, float s,
float t); /*set i-th vertex texture coordinate*/
//到Vec4的转化,方便进行矩阵计算
std::array<Vector4f, 3> toVector4() const;

函数实现

只有一个函数是值的讲解的toVector4:这个函数把三角形顶点坐标转化为齐次坐标后返回。

std::transform是一个通用算法,用于对输入范围中的元素执行给定的操作,并将结果存储在输出范围中。在这个例子中,我们使用std::transform(std::begin(v), std::end(v), res.begin(), [](auto& vec) { ... })来将v数组中的每个Vector4f对象转换为res数组中的对应对象。[](auto& vec) { ... }是一个lambda表达式,用于定义转换操作。

1
2
3
4
5
6
7
8
std::array<Vector4f, 3> Triangle::toVector4() const
{
std::array<Vector4f, 3> res;
std::transform(std::begin(v), std::end(v), res.begin(), [](auto& vec) {
return Vector4f(vec.x(), vec.y(), vec.z(), 1.f);
});
return res;
}

rasterizer

这个类就很有意思了,从类的数据成员开始看:

1
2
3
4
5
6
7
8
9
10
11
12
13
14
15
16
17
18
19
20
21
22
class rasterizer
{
private:
//三个投影矩阵
Eigen::Matrix4f model;
Eigen::Matrix4f view;
Eigen::Matrix4f projection;

//顶点缓存
std::map<int, std::vector<Eigen::Vector3f>> pos_buf;
std::map<int, std::vector<Eigen::Vector3i>> ind_buf;

//颜色缓存
std::vector<Eigen::Vector3f> frame_buf;
//深度缓存 暂未使用
std::vector<float> depth_buf;

//显示区域参数
int width, height;
//工具
int next_id = 0;
};

frame_buf存储的是最后的颜色结果,虽然直译是指框架缓存。(英语不好,勿喷)
有了这些数据成员,就开开始写数据的构造和赋值了。构造只有对显示区域参数的初始化:

构造

1
2
3
4
5
6
//raterizer.cpp
rst::rasterizer::rasterizer(int w, int h) : width(w), height(h)
{
frame_buf.resize(w * h);
depth_buf.resize(w * h);
}

赋值

需要外部输入的数据成员还有

  • model
  • view
  • projection
  • pos_buf
  • ind_buf
1
2
3
4
5
6
7
8
9
10
11
12
13
14
15
16
17
18
19
20
void rst::rasterizer::set_model(const Eigen::Matrix4f& m){
model = m;
}
void rst::rasterizer::set_view(const Eigen::Matrix4f& v){
view = v;
}
void rst::rasterizer::set_projection(const Eigen::Matrix4f& p){
projection = p;
}
//导入顶点坐标和顶点索引
rst::pos_buf_id rst::rasterizer::load_positions(const std::vector<Eigen::Vector3f> &positions){
auto id = get_next_id();
pos_buf.emplace(id, positions);
return {id};
}
rst::ind_buf_id rst::rasterizer::load_indices(const std::vector<Eigen::Vector3i> &indices){
auto id = get_next_id();
ind_buf.emplace(id, indices);
return {id};
}

上面三个MVP函数是非常简单的,没什么好讲的,但是导入顶点坐标和索引的函数,可得好好讲讲。
首先是为什么这个两个函数返回值分别是rst::pos_buf_idrst::ind_buf_id ,在原代码框架里给了这么一段解释:

1
2
3
4
5
6
7
8
9
10
11
12
13
14
15
16
/*
For the curious : The draw function takes two buffer id's as its arguments.
These two structs make sure that if you mix up with their orders, the
compiler won't compile it. Aka : Type safety
*/
/*
对于感兴趣的人 : draw 函数接受两个缓冲区ID作为参数。
这些两个结构体确保如果将它们顺序混乱,编译器不会编译它。
又名 : 类型安全
*/
struct pos_buf_id{
int pos_id = 0;
};
struct ind_buf_id{
int ind_id = 0;
};

在我们的draw函数里面,直接对id进行了下标访问,因为我们不希望再去浪费查找的时间,这样一个设计可以让程序高效而安全。这就像是给一个整形变量贴上了标签一样。两个不同的返回值类型的存在,使得我们可以存在相同的id在pos_bufind_buf中,而不会产生问题。

而至于为什么要返回这么一个值呢?

这是因为我们在使用rasterizer类的时候,需要获得导入数据的控制buf_id,才能对导入的数据进行访问。

输出

数据成员的初始化和赋值都已经解决了,接下来就是如何准确的进行光栅化的问题了。光栅化要做的事情就两件,一、把颜色缓存填充好;二、深度缓存填充好。

一、颜色缓存

首先实现一个填充颜色的小函数rst::rasterizer::set_pixel(const Eigen::Vector3f& point, const Eigen::Vector3f& color)
作为rst::rasterizer 类的成员函数,他需要设置指定点的颜色,但是注意frame_buf是一个数组,数组意味着越界的风险,所以需要在设置之前判断下标的位置。

1
2
3
4
if (point.x() < 0 || point.x() >= width ||
point.y() < 0 || point.y() >= height) return;
auto ind = (height-point.y())*width + point.x();
frame_buf[ind] = color;
二、深度缓存

这个作业没有涉及到深度缓存,因为绘制的是一个平面的三角形,所以深度缓存留到下一次作业讲解。


games101 HomeWork1
http://hexo.zhywyt.me/posts/6295/
作者
zhywyt
发布于
2023年7月23日
更新于
2024年10月22日
许可协议